There are certain steps I carry out within my design process, these steps can be different with subjects or areas I design for. Following these steps of research, self evaluation and assessments helps me to fully achieve what I set out and to work to my best to assess and react to changes.
From my starting point, if its a project brief or specific piece of work, I brainstorm ideas in my sketchbook by making a mind map with branches coming off subjects that lead me onto other subject matter. From this I can think more laterally instead of looking at the surface of what comes to mind first, this then backs up my ideas and gives them more integrity and grounds to work on. It also gives me areas to start my research and to begin thinking more visually of what I want. From initial note making I write down things that are happening now in the media or within my own surroundings that are related to beginning point of my work, from this I can start further research and see the origins of this media or similar events.
Next, I begin using different types of research such as primary for example I could go out and take photographs, interview people, take surveys, make videos or sound recordings. This type of research works well as its my own account but also a first hand account of other peoples opinions right now instead of text that can be from years ago that may not be true now. The second type of research I use is secondary research, this can be from the internet, books, newspapers, movies or biographies. These are accounts of other peoples opinions and may not be fact or true at this moment anymore. However this type of research is good to get a broader range of opinions and accounts to give me more angles to look at and work with, this will also appeal to a larger audience. The research i then take pictures and text into my sketchbook making notes and highlighting certain things that i can further research. From these notes i start to make small sketches and drawings or ideas i get. The first area of research i usually do is the obvious to get a basic knowledge of what the starting point is about, from this i research artists using similar techniques or areas that i think will be interesting. This is when i go into deeper research and start my sketches.
From this research and my ideas I start to experiment with materials and techniques, whilst all the time doing further research into the materials i use, what else i can do with them and what artists use them to reference to my work. From my sketchbook I usually have more than one idea or pathway so during the experimenting stage i explore each of these making small maquettes to see how they perform and look without fully making it. This gives me a better idea of how each idea works in real life more than in theory.
This leads me onto making assessments as I go along through each idea, I write down what went well, what didn't go well, how to change it and other ideas I have. This allows me to refine my work and make it more focused and effective. I also ask others in my class and at home what they feel, how they react and what idea they get of my work. This helps give another perspective and frees me up from just looking at my point of view. Other people also have fresh ideas as they work in different mediums to me such as graphics or textiles, this allows me to add other elements to my work.
My last stage is to refine my work as much as I can and assess my work after each lesson. This then gives me my final idea that has been tested through maquettes, sample making, deeper research and assessments to work at its full potential. After my final design or piece has been made I assessment my work one last time to note down what I could of changed, if I felt it fully worked to what i wanted or to its best and if it has given me ideas to further it into other projects. I also gain assessments from others whether they felt my work was effective and if it made them feel a certain emotion.
Overall, I feel a good design process is important for producing your best and most effective work as it allows you to look from all angles and be informed with a good background knowledge and foundation to your piece that gives it integrity and value.

Bethany Joy Thompson
Wednesday, 3 October 2012

Tuesday, 2 October 2012
Equaliy and Diversity ED 1.4
ED 1.4
Equality and Human Rights Commission
We have a statutory remit to promote and monitor human rights; and to protect, enforce and promote equality across the nine "protected" grounds - age, disability, gender, race, religion and belief, pregnancy and maternity, marriage and civil partnership, sexual orientation and gender reassignment.
http://www.equalityhumanrights.com/about-us/
Unitied Nations and the Declaration of Human Rights
The Universal Declaration of Human Rights is generally agreed to be the foundation of international human rights law. Adopted in 1948, the UDHR has inspired a rich body of legally binding international human rights treaties. It continues to be an inspiration to us all whether in addressing injustices, in times of conflicts, in societies suffering repression, and in our efforts towards achieving universal enjoyment of human rights.
http://www.un.org/en/documents/udhr/hr_law.shtml
Equality and Human Rights Commission
We have a statutory remit to promote and monitor human rights; and to protect, enforce and promote equality across the nine "protected" grounds - age, disability, gender, race, religion and belief, pregnancy and maternity, marriage and civil partnership, sexual orientation and gender reassignment.
http://www.equalityhumanrights.com/about-us/
Unitied Nations and the Declaration of Human Rights
The Universal Declaration of Human Rights is generally agreed to be the foundation of international human rights law. Adopted in 1948, the UDHR has inspired a rich body of legally binding international human rights treaties. It continues to be an inspiration to us all whether in addressing injustices, in times of conflicts, in societies suffering repression, and in our efforts towards achieving universal enjoyment of human rights.
http://www.un.org/en/documents/udhr/hr_law.shtml
Friday, 28 September 2012
Wig Making
We tried wig making today based on hair styles from the 17th century. Wigs were worn to show wealth and class as the rich could afford to cut their hair short from the lice that were common and to have big extravagant wigs. The womens wigs often had sponge or padding inside to fill them out and give them volume to then wrap the hair around. The hair was usually white and had ringlet curls going around the head.

Rich men also wore wigs as it showed their wealth and class. The hair looks quite feminine compared to mens hairstyles today with long curled wigs that look back combed.


We made a skull cap as a base for the wig using a carrier bag and masking tape to fit to a manniquin head. From this i curled strips of paper using scissors and taped into position to create a tube effect around the bottom of the head, i wanted to make two rows of curls with a large combed over piece on top.


Christian Lacroix Fall 2007
I looked into paper wig making and found some interesting designs and techniques by Amy Flurry. She was influenced by the mistress of Louis XV of France, Madame De Pompadour, who was famous for the Pompadour hair style.


Rich men also wore wigs as it showed their wealth and class. The hair looks quite feminine compared to mens hairstyles today with long curled wigs that look back combed.
We made a skull cap as a base for the wig using a carrier bag and masking tape to fit to a manniquin head. From this i curled strips of paper using scissors and taped into position to create a tube effect around the bottom of the head, i wanted to make two rows of curls with a large combed over piece on top.


To create a shape to build on i used wadding on the rest of the head and taped into position then wrapped over strips of paper all meeting at one point around the crown.

I felt the profile of the wig looks effective and similar to the painting i referred to, although from the front as its made from paper you can see the wadding underneath and looks like a crown shape. After making this practice piece it has made me want to do further research into modern wig making and do this for my finished piece in costume. Iwant to look into other syles of wigs from this time and experiment making them modernised.

Christian Lacroix Fall 2007
I looked into paper wig making and found some interesting designs and techniques by Amy Flurry. She was influenced by the mistress of Louis XV of France, Madame De Pompadour, who was famous for the Pompadour hair style.

Wednesday, 26 September 2012
Life Drawing
So it poured it down today! We did our life drawing outside this lesson sat over looking the rooftops of construction and it was only raining slightly so everytime i made a mark with my pen the rain would land on my paper and make it bleed out but it had a nice effect. I was getting frustrated drawing buildings as it ment i had to draw quite graphic and straight edge lines which i cant do! So i tried drawing the fence with ivy growing around it which went better but i couldnt draw into great detail.
We moved inside when the rain started coming down and went into 2D to try drawing the skeletons with fabric around. I tried to focus more on using light and heavy mark making to create more depth and also wanted to try cross hatching which i saw in Leonardo Da Vincis painting i researched yesterday as it had good curves and dimension to it.


We moved inside when the rain started coming down and went into 2D to try drawing the skeletons with fabric around. I tried to focus more on using light and heavy mark making to create more depth and also wanted to try cross hatching which i saw in Leonardo Da Vincis painting i researched yesterday as it had good curves and dimension to it.


I think my use of depth went better than my last life drawing lesson as i tried to made the back darker going lighter towards the front. The ribcage i feel works quite well however the rest around it make it seem lost so i need to make more precise lines. I tried more with cross hatching which i felt worked well on the skull and bottom of the spine as it creates curves and makes the object seem more 3D.
Tuesday, 25 September 2012
Lino Printing
In Jackies lesson today we looked at different ways of printing to mix with embroidery. The first one i looked at was printing using lino, for this i needed to carve an image into the lino depending on what relief i wanted. I tried to create a negative image of a rose and to also use the stalks as a way of connecting the image when repeating it.
 This i felt worked well as i carved out the darker more shadowed areas, i also tried to vary the depth i carved to try and give it a smoother gradient. The technique was then to roller paint onto a paint pallete as thin as possible to then roll onto my print. From this the prints i made were faded and some areas were missed out as there wasnt a lot of paint. I then tried using a thicker amount of paint this then worked much better creating a bolder more vibrant image, the risk is that if too much paint is used it could fill the blank spaces and the edges will bleed creating a blurred image.
 I did some research into artists using lino printing and found some bold and interesting pieces that i would like to try within my own work. I feel this technique would work well with illustration or printing my own fabrics.


Unknown artists.


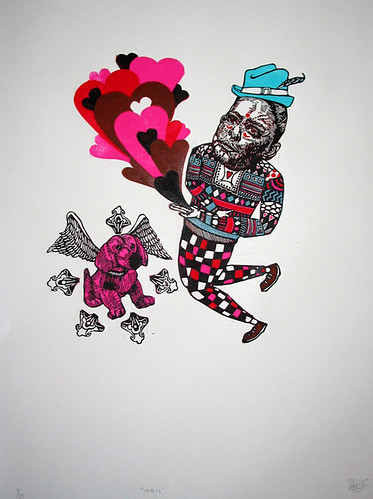
Unknown artists.
Barry Flanagan
Chatsworth House-Initial Research
I'm looking forward to seeing Barry Flanagans work in the gardens of Chatsworth House. His sculptures of hares remind me of Tim Burtons sketches of strange warped characters that are similar to a comic child like style. His sculptures are made from broze so I'm interested to see what effect this has to contrast with the subject matter.

There are also a collection of drawings and paintings in the Old Masters Drawing Cabinet such as Leonardo Da Vinci's 'Leda and the Swan'. I like the way he uses curves and hatched lines to make it 3D, from this i would like to try doing my own sketches using his technique.

http://www.chatsworth.org/whats-on/events/beyond-limits-sculpture-exhibition-in-the-garden
I'm looking forward to seeing Barry Flanagans work in the gardens of Chatsworth House. His sculptures of hares remind me of Tim Burtons sketches of strange warped characters that are similar to a comic child like style. His sculptures are made from broze so I'm interested to see what effect this has to contrast with the subject matter.
There are also a collection of drawings and paintings in the Old Masters Drawing Cabinet such as Leonardo Da Vinci's 'Leda and the Swan'. I like the way he uses curves and hatched lines to make it 3D, from this i would like to try doing my own sketches using his technique.

The Unweavable Object + Underground Forest - Aiko Tezuka
Aiko Tezuka
From textiles i had to research the term 'In Stitches' so firstly researched into embroidery and artists that use them in a different and unusual way. I first came across Aiko's work where he not only encorporates the image on the front of the fabric but also uses the thread left over. This creates an installation piece allowing viewers to walk around the usually 2D art form and get other angles like a behind the scenes of a piece of embroidery.

I like the way he doesnt particularly use expensive or patterned fabrics to show history or its origins, instead the imagery he uses portrays ancient sculpture, European paintings, Chinese landscape paintings andc Japanese ancient furniture ornaments. He shows a mix of cultures and places in a basic form using bright contrasting colours that look modern and lively.
Unweavable Object


His work uses space well bringing a 2D piece into a 3D form and creates movement within the fabric.
I like how the pattern on the fabric is still intact but has been stretched and blurred as it has been unwoven and pulled apart. From these images i would like to try this effect creating my own fabric or embroidery patterns and then undoing them to see how this effects certains fabrics.
Underground Forest
Spiral Wacoal Art Centre


This piece is 2 metres high and allows the viewers to walk through the threads that have been left loose from the embroidery on top of the fabric. The pattern itself cannot be seen from underneath but on when you stand on the stairs around thepiece that you can see the imagery.
Subscribe to:
Posts (Atom)